

About Me

- Susan
- I am a wife, mama and grandmama getting through life by hanging on to a needle and thread.
Monday, December 27, 2010
On The Road Again
Saturday, December 25, 2010
Merry Christmas!
The branch that bears the bright holly, the dove that rests in yonder tree.
The light that shines for all to see, the peace of Christmas Day.
May your home be filled with peace and love this holiday season!
Friday, December 24, 2010
Thursday, December 23, 2010
Cookies For Santa

1/2 cup butter (no substitutes)
1/4 cup confectioners sugar
1 teaspoon vanilla
1/2 teaspoon peppermint extract
1 cup flour
1/4 cup crushed peppermint candy canes
-----------------------------------------
1 cup white chocolate melting candy
1/4 cup crushed peppermint candy canes
Preheat oven to 350 degrees F. Cream together butter and confectioners' sugar until smooth. Stir in vanilla and peppermint extract. Mix in the flour, and then crushed candy canes.
Shape dough into 2 x 1/2 inch logs. Place logs 2 inches apart on cookie sheets. Bake for 10 to 13 minutes in preheated oven, or until firm. Let cookies cool completely before removing from pan.
Melt the white chocolate over a double boiler, stirring frequently until smooth. Dip one end of each cookie into the chocolate and sprinkle with crushed candy canes. Place onto waxed paper until set.
Melt the white chocolate over a double boiler, stirring frequently until smooth. Dip one end of each cookie into the chocolate and sprinkle with crushed candy canes. Place onto waxed paper until set.
Wednesday, December 22, 2010
One To Go!

Tuesday, December 21, 2010
The Knit-a-thon Continues

Monday, December 20, 2010
Another Pair Of Fingerless Gloves

Saturday, December 18, 2010
Selvage Cup Cozy

Wednesday, December 15, 2010
Pillowcases!
Pillowcases are fast and easy to make and now they are even easier to make with this tube method. Pillowcases make great gifts and they can even be used as gift wrapping, so if you need a quick last minute Christmas gift or gift bag, a pillowcase project might just be for you.

Sunday, December 12, 2010
Chocolate Pretzel Rings

Chocolate Pretzel Rings
1 package pretzel wheels
1 package milk chocolate or white chocolate wafers
1 package M&M's
Place the pretzels on foil lined baking sheets; place a chocolate wafer in the center of each ring. Bake at 275 degrees F for 1-2 minutes or until chocolate is softened. Remove from the oven. Place an M&M on each, pressing down slightly so chocolate fills the ring. Refrigerate for 5-10 minutes or until chocolate is firm. Store at room temperature.
Wednesday, December 8, 2010
Ami Simms Is On The Quilt Show!
Ami Simms is this month's special guest on The Quilt Show with Alex Anderson and Ricky Tims! You can watch the full one hour episode at www.thequiltshow.com for free simply by registering a user name and password with the website. This show is a "must see" for anyone whose life has been touched by Alzheimer's or for those who want to learn more about the Alzheimer's Art Quilt Initiative.
Monday, December 6, 2010
Another Kool-Aid Experiment

Thursday, December 2, 2010
Kool-Aid Addiction


Wednesday, December 1, 2010
Snow Lies

Monday, November 29, 2010
Christmas Cover-up

Friday, November 26, 2010
More Mittens

Thursday, November 25, 2010
Tuesday, November 23, 2010
Apple Bread

1 1/2 cups flour
1 teaspoon cinnamon
1/2 teaspoon baking soda
1/4 teaspoon baking powder
1/4 teaspoon salt
1/4 cup vegetable oil
1 cup sugar
1 egg, beaten
1/4 teaspoon vanilla
1 cup apple, coarsely shredded
1/2 cup walnuts, chopped (optional)
In bowl, combine flour, cinnamon, baking soda, baking powder and salt; set aside. In a large mixing bowl, place oil, sugar, egg, vanilla and apples. Stir into flour mixture. Add walnuts and mix. Pour mixture into greased 8x4 inch bread pan. Bake at 350 degrees for 40-45 minutes or until bread tests done. Cool for 10 minutes on wire rack before removing from pan.
Monday, November 22, 2010
Knittin' Mittens

Thursday, November 18, 2010
Mighty Oaks From Little Acorns Grow

Cast on 6 stitches.
Divide stitches evenly among the needles and join in round, taking care not to twist.
Round 1: kfb all around. (12 stitches)
Round 2: knit.
Round 3: kfb, k1, kfb, k1...repeat to end of round. (18 stitches)
Round 4-9: knit.
Round 10: k2 tog, k1, k2 tog, k1...repeat to end of round. (12 stitches)
Round 11: knit.
Round 12: knit 2 tog all around. (6 stitches)
Break yarn and thread through remaining 6 stitches. Stuff the acorn with a bit of wool yarn before drawing the stitches together and then tie off.
To felt the acorn: Add a few drops of liquid soap to a small bowl of hot water. Wet the acorn thoroughly in the water/soap mixture and then roll the acorn around in the palms of your hands until you can no longer see the knit stitches. Rinse in cold water and squeeze out excess water while forming into an acorn shape. Allow to dry and glue on an acorn cap.
Monday, November 15, 2010
Tumblers

Saturday, November 13, 2010
Wavy Wiper Win!

Friday, November 12, 2010
Have You Ever?

Thursday, November 11, 2010
Veterans Day
Heartfelt thanks to our nation’s military service members, both veterans and active duty, for their dedication, courage, accomplishments and sacrifices to protect our everyday freedoms.
Tuesday, November 9, 2010
There Was Shopping Too!

Monday, November 8, 2010
Home Again

Friday, November 5, 2010
Thursday, November 4, 2010
Mission Accomplished!
 |
I think this is the fastest I have ever completed a quilt, but I haven't done anything else this week either. It was a bit of a challenge to get it done in time, but I think the real challenge will be finishing everything else that I need to have done before we leave! Laundry, a bit of cleaning, packing...let the countdown begin!
Wednesday, November 3, 2010
Quilting On A Prayer

Tuesday, November 2, 2010
It's A Top!

Monday, November 1, 2010
To Infinity And Beyond!

Sunday, October 31, 2010
Friday, October 29, 2010
Fall Felting

Thursday, October 28, 2010
Do You Recognize This Quilt Pattern?

Thanks to Murial in Ontario, Canada we have an answer to the mystery! The name of the quilt is Chinese Box and a pattern very similar to the quilt in the photo can be found online at Quilted Indigo.
Tuesday, October 26, 2010
Monday, October 25, 2010
I Won!
 I entered several giveaways during the Fall Into Fall Quilter's Giveaway extravaganza and I was the lucky winner of this beautiful fall bag and accessories from The Quilting Booklady! Becky's blog was a new to me blog and I'm so glad to have found it! She is working on some great projects and shares fantastic quilty ideas...I see an ironing board cover just like the one she just finished in my future!
Thursday, October 21, 2010
Pills
 I have been fighting a sinus infection and finally broke down and went to the doctor on Tuesday. I came home with several bottles of pills and a promise that I would start feeling better in a couple of days. With that bit of good news, I prewashed some flannel, so I would be all set to start working on a new quilt once I started feeling better. I don't know how well you can see in the photo, but antibiotics and decongestants weren't the only pills that I got this week. All of the other flannels came out of the wash beautifully, but the white flannel (which was washed alone) came out covered in pills! It really gripes me that quilt shop quality fabric preformed this way, but I'm happy that I discovered it before it was sewn into the quilt!
Monday, October 18, 2010
Banana Blueberry Muffins
 These are my husband's all time favorite muffins!
Banana Blueberry Muffins
2/3 cup sugar
1/3 cup butter, melted
1/8 cup buttermilk*
1 egg
1/2 teaspoon vanilla
1 large banana, mashed
1 cup flour
1/2 teaspoon baking soda
1/8 teaspoon salt
1 cup blueberries
Heat oven to 350 degrees. In a large bowl, combine sugar, butter, buttermilk, egg and vanilla. Beat until creamy. Stir in mashed banana. Add flour, baking soda and salt and mix just until moistened. Stir in blueberries. Spoon into paper-lined muffin cups. Bake 25-30 minutes or until toothpick in the center comes out clean. Makes 1 dozen muffins.
* 1/2 teaspoon vinegar plus enough milk to equal 1/8 cup can be substituted for 1/8 cup buttermilk.
Saturday, October 16, 2010
Are You A Good Witch, Or A Bad Witch?
 One of my all time favorite movies is The Wizard Of Oz, so when I saw this pattern by Bloomin' Minds a few weeks ago I couldn't resist! I'm just tickled with how the top has turned out. It's a small wall hanging (14 x 17) so I shouldn't have any trouble getting it quilted and bound in time to hang for Halloween, but I love it so much that it may find a permanent spot in my sewing room!
Wednesday, October 13, 2010

Tuesday, October 12, 2010
Monday, October 11, 2010
A Bit Of Backstitch
 As much as I would like to be an embroiderer, I just am not, but sometimes a project comes along that I can't resist and I end up having to do a bit of backstitch. It's not the best work, but I think the finished project is going to be so cute that the bad stitches won't matter!
Friday, October 8, 2010
Getting Ready For Winter
 It seems like there is always so much to be done this time of year to get ready for winter and this year is no exception. We have been working at putting a new roof on our house, plus I've been doing a bit of fall house cleaning and now that the sun has returned there are flower beds that need tending and leaves that need to be raked. Don't worry though, even with all that have to be done, I am still finding some time to do some things that I want to get done...like basting my Dear Jane, so it will be all ready for me to quilt once my chores are finished!
Thursday, October 7, 2010
Speaking Of Cake...
 Birthdays are nature’s way of telling us to eat more cake, so today I will be eating cake!
Sunday, October 3, 2010
4 - Layer Cake Quilt
 The pattern that I used for this charity quilt is called 4 - Layer Cake. I still haven't figured out why it's called a 4 layer cake because it only uses 1 layer cake to make a nice sized throw. For those of you who aren't familiar with layer cakes of the fabric variety, they consist of 40 - 10" squares from a collection of fabrics...very pretty and zero calories! I made my own layer cake from scratch for this quilt using scrap plaids, but even without the pre-cut layer cake it still went together very fast and easy!
Friday, October 1, 2010
Not Pumpkin Bread
 Has anyone else noticed that it's darn near impossible to find a can of pumpkin on the grocery store shelf? Apparently poor weather conditions have created a pumpkin shortage! In my book, it's just not Fall without pumpkin chocolate chip cookies, pumpkin pie, pumpkin muffins, pumpkin bars or pumpkin bread. What's a pumpkin lover to do? Replace the pumpkin with mashed sweet potatoes! I used mashed sweet potatoes in place of the canned pumpkin in my regular pumpkin bread recipe and it was impossible to tell the difference!
Not Pumpkin Bread
1 1/2 cups flour
1/2 teaspoon salt
1 cup sugar
1 teaspoon baking soda
1 cup mashed sweet potatoes
1/2 cup vegetable oil
2 eggs
1/2 teaspoon nutmeg
1/2 teaspoon cinnamon
1/2 teaspoon allspice
Preheat oven to 350 degrees. Sift together the four, salt, sugar, and baking soda. Mix the sweet potatoes, oil, eggs and spices together, then combine with the dry ingredients just until moistened. Pour into greased loaf pan. Bake 50-60 minutes or until bread tests done.
Thursday, September 30, 2010
Yo Mama's Big Fat Booties
 I just love this slipper sock pattern! I'm not sure if it's because the socks knit up fast with worsted weight wool, because they fit so nicely and keep my feet toasty warm or just because I love the name of the pattern so much...Yo Mama's Big Fat Booties! Either way, this pattern makes a great pair of slipper socks!.
Wednesday, September 29, 2010
The Ladies of the Valley Quilt Guild's Show
 The Ladies of the Valley Quilt Guild of Addison, NY held their annual quilt show this past Friday and Saturday. This guild was just formed in 2008 and has already grown to over 40 members and judging by the quilts that were on display, they are a group of very talented ladies! As you can see, gorgeous quilts covered almost every square inch of the Addison Town Hall. It was well worth the trip to see the quilts that they have been working on for the past year and I'm already looking forward to next year's show!
Tuesday, September 28, 2010
Kim Diehl Trunk Show
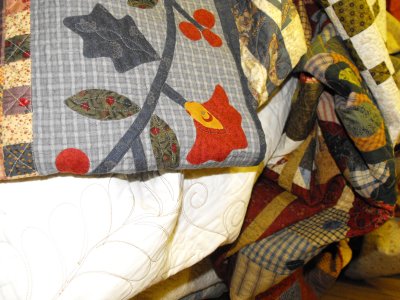 The pile of quilts in this photo are just a small representation of the quilts shown by Kim Diehl during a trunk show and lecture that I attended last Friday night. Kim showed quilt after quilt from all four of her books including quilts and projects from her new book, Simple Graces, that is due out in a couple of weeks. My first quilty love has always been country folk and seeing these quilts made my heart literally skip a beat! I had almost forgotten how much I enjoy this style of quilt. I think it's time to put away the bright colors and hand dyed fabrics for awhile and go back to my country colored roots!
Sunday, September 26, 2010
Fall-O-Ween

Get ready for the big Fall-O-Ween blog hop! For the next ten days the designers listed below will be offering a free fall themed pattern. As if a free pattern isn't enough, at the end of the blog hop there will be a grand prize drawn randomly from all of the people who commented on each of the ten designer's blogs, so make sure you pick up your free pattern each day and be sure to say thank you when you do!
September 27 - Gudrun from GE Designs http://www.gudrun.typepad.com/
September 28 - Sandy from Pieces from my Heart http://www.piecesfrommyheart-sgervais.blogspot.com/
September 29 - Roseann from Rosebud's Cottage http://www.rosebudscottage.typepad.com/
September 30 - Kari from New Leaf Stitches www.newleafstitches.com/blog
October 1 - Terry from Atkinson Designs http://www.terryatkinson.typepad.com/
October 2 - Heather from Anka's Treasures http://www.ankastreasures.wordpress.com/
October 3 - Terri from Whimsicals http://www.whimsicals.typepad.com/
October 4 - Carrie from Miss Rosie's Quilt Co http://www.lavieenrosie.typepad.com/
October 5 - Linda from Linda Lum DeBono http://www.lindalumdebono.blogspot.com/
October 6 - Pat from Pat Sloan & Co. http://www.patsloan.typepad.com/
Friday, September 24, 2010
About The Name
 I need to acknowledge another person who helped with "Sugar and Spice and Everything Bright"...Julie of Me and My Quilts ~ Exploring the Possibilities. Julie gave me the name for this quilt! Back in July she was asking opinions about names for a quilt that she had just finished and offered "Pink at Play" and "Sugar and Spice and Everything Bright" as options. I commented that I thought she should name her quilt "Pink at Play" because "Sugar and Spice and Everything Bright" was the perfect name for the top that I had just finished! She emailed me right away and graciously told me that I was welcome to use the name for my quilt. Considering the story of how the quilt came to be there really couldn't have been a better name for it!
Thursday, September 23, 2010
Sugar and Spice and Everything Bright
 "Sugar and Spice and Everything Bright" is my entry for the Mountain Laurel Quilt Guild's 2010 Exhibit. It is the quilt that I made with the help of my two oldest grand- daughters over the past few months. I knew that they would get a huge thrill out of seeing a quilt that they worked on hanging at the art center, so that is why I chose this one for the exhibit. It was such fun taking the girls to see all of the quilts on display, but the most fun came when a woman stopped to admire the quilt while we were there and getting to see the proud looks on their faces when they said, "I helped make that quilt!"
Wednesday, September 22, 2010
Happy Fall Y'all!
 And so it begins...quilting season! Today is the first day of Fall and around here Fall brings cooler temperatures, less daylight and long boring football games on TV, all of which equal more time for me to spend in my sewing room! Happy Fall y'all!
Monday, September 20, 2010
AAQI Ties That Bind Competition
 One of the other challenges for this year's Mountain Laurel Quilt Guild Exhibit was to make an Alzheimer's Art Quilt Initiative donation quilt. The theme was "Ties That Bind" which required that each entry to contain a piece of a necktie. As you can see from the photos a wide variety of quilts
  were entered with no two alike! At the close of the exhibit all of the Ties That Bind quilts will be donated to AAQI to help raise money for Alzheimer’s research.
To find out how you can make an AAQI donation quilt, please visit www.alzquilts.org
Thursday, September 16, 2010
"Out of the Box" Challenge
 The challenge for the Mountain Laurel Quilt Guild's 2010 exhibit was "Out of the Box". Guild members were asked to make a quilt (less than 36" in any direction) in any shape quilt other than the traditional square or rectangle. My entry turned out a little more rectangular than I had hoped, but it certainly was a leap out of my box. I used all of my own hand dyed fabrics, free pieced curves in the style of Ricky Tims' Caveman Quilt's and then I "quilted it to death". The whole project was a real stretch for me, but it was fun to step "Out of the Box"!
Monday, September 13, 2010
Dear Jane Progress!
 The borders are finally on and I can now say that my Dear Jane top is finished! It took me two years to get to this point, but that's with it sitting untouched in the closet for a good part of that time. My plan is to keep it out of the closet and finish it this winter. If the winter is as long and cold as I anticipate, then I will have lots of time for hand-quilting!
Saturday, September 11, 2010
Friday, September 10, 2010
Apple Dumplings
 What in the world could you possibly make with ingredients like refrigerated crescent roll dough, apples and Mountain Dew? Apple Dumplings! I honestly thought twice about trying this recipe, but The Pioneer Woman has never steered me wrong and I needed a quick easy dessert for a crowd, so I threw caution to the wind and made Ree's Apple Dumpling recipe. They were, as The Pioneer Woman says, "beyond imaginable".
Apple Dumplings
2 granny smith apples
2 cans (8 oz.) crescent rolls
2 sticks butter
1 ½ cups sugar
1 teaspoon vanilla
cinnamon, to taste
1 can (12 oz.) mountain dew soda
Peel and core apples. Cut each apple into 8 slices each. Roll each apple slice in a crescent roll. Place in a 9 x 13 buttered pan.
Melt butter, then add sugar and barely stir. Add vanilla, stir, and pour entire mixture over apples. Pour Mountain Dew around the edges of the pan. Sprinkle with cinnamon and bake at 350 degrees for 40 minutes. Serve with ice cream, and spoon some of the sweet sauce from the pan over the top.
Subscribe to:
Comments (Atom)