About Me

My photo
I am a wife, mama and grandmama getting through life by hanging on to a needle and thread.
Showing posts with label Hand Dyeing. Show all posts

Friday, June 26, 2015

Stamping With Bleach

The last project that Miss One and I worked on, while she was here visiting, was stamping with bleach.  We used the tutorial from Plenty of Paprika and it couldn't have been easier!  Just a couple of foam star stamps and a little bleach turned a plain gray t-shirt into a designer t-shirt!

Wednesday, June 24, 2015

A Little Dyeing

Another project that my granddaughter wanted to try was batiking with Elmers School Glue Gel.  We used the tutorial from Sweet Verbena.  Miss One picked a Taylor Swift quote for her t-shirt.  She had a couple of mishaps when writing with the glue, so we washed the shirt and started over a couple of times.  Once we made a paper pattern and put it under the shirt to trace, it was much easier to keep writing straight and centered.  After the glue dried overnight we dyed the shirt a pretty turquoise color.  That was a scary process!  When the shirt came out of the dye it looked like the dye had soaked through the glue.  We definitely thought we had a huge craft fail on our hands, but when it came out of the washing machine the writing had magically appeared!  SUCCESS!  She also decided to dye the shoelaces on her new zentangle sneakers while we were dyeing the t-shirt.  Together they make a pretty cool outfit!

Wednesday, February 4, 2015

Dyed And Died

My #1 daughter-in-law has found that she loves wool felt applique, so we have been searching the thrift stores for wool skirts to recycle into penny rugs and candle mats.  I was telling her how easy it is to dye wool with koolaid, so we planned an evening to dye with all the grandgirls while the men folk watched football.  There were six of us dyeing felt pieces and heat setting them in the microwave.  Mixing and blending, we wanted to make all the colors we could imagine! The only thing we didn't take into consideration was giving the microwave a chance to cool off in-between batches.  Yep, you guessed it...the microwave overheated and died!  Unfortunately, the frugal hand dyed wool turned out to be darned expensive once the cost of a new microwave was figured in, but she still ended up with some very pretty wool felt!

Friday, July 20, 2012

More On Kool-Aid Dyeing

I received several questions about the yarn I dyed earlier this week and thought that I should clarify a few things about dyeing with Kool-Aid.  First and foremost, I need to warn you that dyeing yarn with this method is highly addictive (as you can see by these six skeins of newly dyed yarn)!  Secondly and probably most importantly, Kool-Aid will only dye animal fiber (wool, mohair, alpaca) so don't try to dye cotton yarn or fabric with Kool-Aid unless you take disappointment well.  With that said, you could easily dye wool fabric or wool felt with Kool-Aid and I imagine that the results would be wonderful!  Thirdly, when dyeing with Kool-Aid it's not necessary to add vinegar because of the citric acid contained in the drink mix, however, I like to add a bit of vinegar to the pre-soak just to be on the safe side.  (I used about a 1/2 cup of vinegar to about 2 quarts of water.)  Finally, to heat set the dye, I placed the wet yarn in a ziplock bag and microwaved on high at 60 second intervals until the water in the bag appeared to be clear.  I think that answers all of the questions, but if you would like more detailed instructions for dyeing yarn with Kool-Aid visit  DyeYourYarn.com.

Wednesday, July 18, 2012

Ice Dyeing

It is extra hot here in Northern Pennsylvania this week, so I thought it would be a good time to try ice dyeing some wool yarn.  I mixed one packet of Kool-Aid with 1/2 cup of water and then froze the mixture in ice-cube trays overnight.  The next day, I soaked the wool yarn in a water/vinegar mixture for about 20 minutes and then drained off the excess water.  I placed the frozen dye cubes on top of the yarn, covered it with plastic wrap, set it outside and let the sun do the rest!  (I did pop the yarn in the microwave for a minute just to make sure it was heat set enough, but I'm not sure it was really necessary.)  As you can see, lemonade, pink lemonade, orange and cherry Kool-Aid ice-cubes make a very pretty variegated pink yarn!  I think I will be doing more ice dyeing this summer!

Wednesday, July 13, 2011

Watercolor Fabric

The grandgirls and I tried a little fabric dyeing experiment last week.  We mixed a bit of regular fabric paint into a cup of water and then painted it onto wet fabric with sponge brushes.  As you can see, we ended up with some very pretty pink and purple pastel fabrics!

Friday, April 1, 2011

Black?

I spotted black food coloring at the grocery store and I couldn't resist buying a bottle for a yarn dyeing experiment.  I mixed three strengths of dye by adding 1 teaspoon, 1/2 teaspoon and 1/4 teaspoon to a 1/2 cup of water each and then poured them over three different sections of the yarn.  I was expecting the yarn to be shades of charcoal grey, but as you can see by the photo the color is more brown than black.  I can't say that I'm disappointed with the results though...the different shades of chocolate brown are absolutely beautiful!

Friday, March 11, 2011

Experimental Design

I have been experimenting dyeing cotton fabric with Sharpie permanent markers and rubbing alcohol this week.  I first tried drawing directly on the fabric with the markers and then dripping the rubbing alcohol on the fabric and that worked alright, but the ink didn't blur as much as I had hoped it would.  However, I discovered that when I pressed another piece of fabric on top of the first one, I ended up with a wonderful subtle
print.  In the interest of not wasting fabric, I decided to try drawing a design on a paper towel, then I dripped rubbing alcohol on the paper towel until the paper towel was saturated and the design was blurred.  After that, I placed a
piece of cotton fabric over the paper towel, pressing gently so the ink would be absorbed into the fabric. (Do make sure to protect your work surface with plastic and wear rubber gloves during the dyeing process or you will end up with a very colorful counter top and fingers to match!)  I let the piece dry thoroughly and then heat set it with an iron. (Take note that rubbing alcohol is flammable, so make sure the piece is completely dry before you expose it to a heat source!)  As I was ironing, I was trying to decide what to do with my tiny "work of art"...a quilted postcard seemed to be the obvious answer (especially since I had a quilty friend with a birthday this week), but I think the possibilities are endless with this technique!


Friday, February 25, 2011

Silk, Sharpies And Alcohol


I just love this idea...it's such a simple process that uses readily available materials and has beautiful results!

Tuesday, February 22, 2011

I Think Phil Might Have Been Wrong

It was 65 degrees on Friday when we left for Philadelphia.  The snow was melting and there were even spots in our yard where the grass was showing through!  I thought sure that spring was certainly coming early, just as Phil predicted.  Spring was definitely on our minds when we were dyeing yarn over the weekend as well!  As you can see, the first skein is reminiscent of fresh honeydew and cantaloupe.  The lil' cowboy chose the color of the middle skein, a sunny orange gradation.  The last skein is a self-striping yarn of bright yellow, spring green and bits of white appropriately named, "Dandelion".  Unfortunately it looks these yarn colors are as close as we are going to get to an early spring.  We came home last night to find a foot of new snow on the ground and temperatures in the low teens.  I think Phil and I need to have a serious talk about his prediction! 

These yarns were dyed with ordinary food coloring and then heat set in the microwave.  There is a very good tutorial that outlines the whole process at BeatleWear.

Friday, February 18, 2011

A New Book!

I am a sucker for a good "how to" book, so when I saw, Hand Dyeing Yarn and Fleece by Gail Callahan, I couldn't resist!  It's the perfect guide for anyone who might be interested in dyeing their own wool yarn or fleece.  It has easy to follow step-by-step directions for many different dyeing techniques including hand-painting, dip-dyeing, self-striping and several others.  I can hardly wait to try them all!  I have all of the supplies ready and this weekend I'm going to pack them up along with a few other things (including Papa) and we're going to the lil' cowboy's house for a visit!  The plan is for the men to do some lil' cowboy wranglin' while we women folk hang out in the kitchen dyeing yarn...it should be a fun weekend!

Thursday, February 3, 2011

Knitting With Kool-Aid

Knitting with kool-aid dyed yarn is almost as much fun as dyeing the yarn itself!  I started knitting a pair of Kids Socks with the Lucky Charms yarn that I dyed after Christmas and I can't tell you how much fun it is to watch the pattern develop as I'm knitting!  I love the tiny green and pink stripes with the little flecks of creamy yellow mixed in and Miss Two agrees...she has already laid claim to this pair of socks!

Monday, January 3, 2011

Lucky Charms

What happens when you mix three generations of knitters/crocheters and more than a few packages of  KoolAid for a week?  You guessed it...lots and lots of yarn dyeing!  I believe we dyed 6 or 7 skeins of yarn over our Christmas vacation!  We used all sorts of color combinations and tried several different techniques too.  We found a stove-top method for self-striping yarn at Streets and YOs that worked especially well!  I used Lemon Lime, Strawberry, Lemonade and Pink Lemonade for this skein which my daughter-in-law appropriately named "Lucky Charms".  Now to figure out the perfect project to make with it!

Monday, December 6, 2010

Another Kool-Aid Experiment

For this dye session I used a skein of "I Love This Wool" in Winter White from Hobby Lobby.  It is a blend of 93% wool and 7% polyamide (a type of nylon) and according to the label it is machine washable.  I had a 40% off coupon, so I thought it would be worth a try to see how it would accept Kool-Aid dye.  I used Blastin' Cherry Berry, Pink Lemonade and Black Cherry Kool-Aid and as you can see the yarn preformed well through the dyeing process.  I do have to wonder how it will wash once knitted though.  Even though the label clearly shows that it can be machine washed and dried, on the inside of the label is a pattern for a felted bag that uses "I Love This Wool" yarn. (???)  I think it will be a good idea to hand wash whatever I decide to make with my new variegated red yarn!

Thursday, December 2, 2010

Kool-Aid Addiction

Who didn't love a glass of ice cold Kool-Aid on a hot summer day when they were a kid?  My favorite flavor was always lemonade, but now I love ALL of the flavors colors!  I'm not drinking it though...I'm dyeing wool yarn with it!  I began with this tutorial from Knit Purl Gurl, a few packages of Kool-Aid and a skein of Patons Classic Wool.  My crock pot was not large enough to hold the yarn, so I used a large glass baking dish (with a lid) and the oven (set at 325 degrees) instead, but other than that the process remained the same. 
As you can see, my yarn turned out beautifully and I'm afraid that I am now hopelessly addicted to Kool-Aid!

Monday, August 10, 2009

Houston, We Have A Problem

My new fascination with fabric dye is creating a problem...it's growing the fabric stash that I have been working so hard to trim down! I think I need to plan some projects and do some stitching before my next dyeing session. How quickly do you think I can use up 7 yards of hand dyed fabric?

Sunday, August 9, 2009

Color From A Bottle

No, I didn't use grape juice to dye these fabrics, but I did use the bottle to dye all of these colors at once! I put a water soaked white 100% cotton fat quarter in the bottom of the bottle and covered it with a red procion dye, followed by a soda ash and water mixture. The process was then repeated with more fabric, blue dye, soda ash mixture, another piece of fabric, yellow dye and more soda ash mixture. The fabrics were allowed to sit undisturbed for a few hours. The dye was then poured off and the fabric removed. Believe it or not, all three of these beautiful fabrics emerged from the murky mess!

Saturday, August 8, 2009

Fun With Shaving Cream

Yesterday I spent the day with a few of my dye hard friends experimenting with some different dyeing techniques. Oh yes, this dyeing thing is fast becoming a new addiction! For these two fabrics, I put the dye on the first piece, then covered it with shaving cream and smeared it around, after that I put another piece of fabric over the shaving cream and pressed it down to make a print of the first fabric. I love the results! These fabrics make me wish that I liked to applique...wouldn't they make wonderful fall leaves?

Wednesday, July 8, 2009

Dyeing For Some Fun!

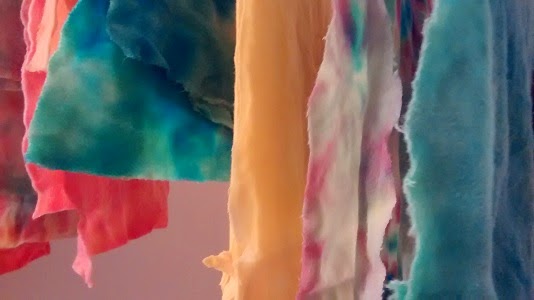
Yesterday I got together with a group of my quilty friends to experiment with a little hand dyeing. I can't even begin to tell you how much fun it was playing with all of the beautiful colors...squirting a bit of dye on some plain white fabric, mixing in a dab of another color, smooshing it all together and then waiting for the big reveal once it was all dry. We followed Patsy Thompson's hand dyeing tutorial which explains the process very well, but rather than using fat quarters for "drip rags" we borrowed Ami Simms' Yo-Yo Sisterhood of the Traveling Panties idea and used cotton panties (new, of course) to wipe the drips, so now we have panties to match our fabric! Every quilter needs hand dyed panties that match her fabric stash, right? If you haven't tried hand dyeing, give it a try...it's great fun and even a beginner will end up with some beautiful one of a kind fabrics!

Blog Archive